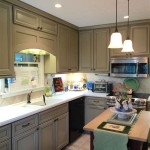
Breakfast nooks are cozy and inviting places to enjoy a cup of coffee or a quick snack. With a little bit of DIY know-how, you can create your own kitchen nook bench that fits perfectly in your space. Here’s how to get started.
Choose the Right Materials
When it comes to DIY projects, the materials you use are just as important as the design. Choose materials that are durable and easy to work with. For a kitchen nook bench, consider using wood, plywood, or MDF. You’ll also need to pick out the right type of foam for the cushion, as well as fabric for the upholstery.
Measure and Cut the Wood
Once you’ve chosen the materials, you’ll need to measure and cut the wood to the right size. Measure the space you plan to put the bench in and then use a saw to cut the wood to size. Make sure you wear protective eye and ear gear while you’re doing this step.
Assemble the Bench
Now it’s time to assemble the bench. Start by attaching the legs to the frame using screws or nails. Then, add the seat and backrest. If you’re using plywood or MDF, you may want to use glue to secure the pieces together. Once the bench is assembled, you can sand it down to make sure there are no sharp edges.
Upholster the Bench
Now it’s time to add the cushion and upholstery. Start by cutting the foam to size and then adding the fabric to the top and sides. Use a staple gun to secure the fabric in place. Then, add the cushion to the bench and secure it with more staples. Finally, you can add a few decorative pillows to complete the look.
Final Touches
Once you’ve finished upholstering the bench, you can add the finishing touches. Consider adding a few throw blankets or a cozy rug to the space. You can also paint the bench or add some decorative trim to give it a more personalized look. With a few simple steps, you can create a stylish and inviting breakfast nook in your kitchen.


Related Posts


