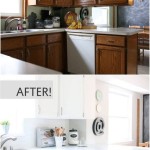
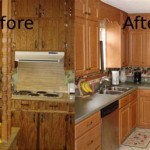
Are you looking to give your kitchen a facelift but don’t know where to start? Re-facing your kitchen cabinets is an easy and affordable way to make your kitchen look brand-new. Read on to learn how to re-face kitchen cabinets DIY.
Step 1: Preparing the Cabinets
Before you get started, your kitchen cabinets need to be properly prepared. This includes cleaning and sanding the surfaces to ensure that the new veneer will adhere. Using a coarse-grit sandpaper, you should sand the surface down until it is rough and even. When you’re done sanding, wipe down the cabinets with a damp cloth to remove all dust and debris.
Step 2: Applying the Veneer
Once the cabinets have been properly prepared, you can apply the veneer. Start by cutting the veneer to the size of the cabinet doors. You can use a veneer roller or a brush to apply an even layer of contact adhesive to the back of the veneer. Then, apply the veneer to the cabinet doors and press it into place. Make sure to remove any air bubbles. If you’re using a brush, you can use a plastic scraper to smooth out any air bubbles or wrinkles.
Step 3: Finishing Touches
Once the veneer has been applied, you should finish off the cabinets with some trim. Measure the length of the cabinet doors and cut the trim to size. You can use a nail gun or a hammer and nails to attach the trim to the cabinet doors. Finally, you should caulk the trim to ensure that the edges are sealed and that the veneer is properly secured.
Step 4: Enjoy the Results
Once you’ve finished re-facing your kitchen cabinets, you can enjoy the results! Your kitchen will have a whole new look and feel and you’ll be able to take pride in the fact that you did it yourself. You can also save money by re-facing your cabinets instead of replacing them.


Related Posts

