Demoing kitchen cabinets is a daunting task for many homeowners and DIY-ers. It’s important to know the proper techniques to ensure that the demolition is done safely and effectively. In this article, we’ll discuss the step-by-step process of demoing kitchen cabinets to help you get the job done with minimal mess and hassle.
Tools Needed
Before you start, you’ll want to make sure you have the right tools for the job. Here is a list of essential items you’ll need:
- Hammer
- Pry bar
- Screwdriver
- Utility Knife
- Safety goggles
- Dust Mask
- Gloves
- Drop cloth
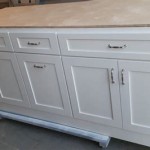
Step 1: Remove Doors and Drawers
The first step in demoing kitchen cabinets is to remove the doors and drawers. It’s best to start with the upper cabinets first since they are easier to access. Use a screwdriver to remove the screws that are holding the hinges in place. Then, use a pry bar to carefully pull the doors and drawers away from the cabinet frames. Place them in a safe location until you’re ready to dispose of them.
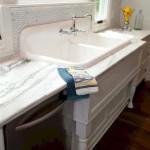
Step 2: Disconnect Plumbing and Electrical Components
If your kitchen cabinets are connected to any plumbing or electrical components, such as a garbage disposal or dishwasher, you’ll need to disconnect them before you can begin the demolition process. Turn off the power to the appliance and disconnect any plumbing lines or electrical wires. It’s best to use pliers or a wrench to loosen the connections.
Step 3: Remove Hardware
Once you’ve disconnected any plumbing and electrical components, it’s time to remove the hardware from the cabinets. Use a screwdriver to remove the hinges, knobs, and handles from the cabinet frames. Place these items in a safe location until you’re ready to dispose of them.
Step 4: Demolish the Cabinets
Now that all of the hardware and components have been removed, it’s time to start the demolition process. Use a hammer to carefully break apart the cabinet frames. Start with the upper cabinets and work your way down to the lower cabinets. Use a pry bar to remove any stubborn pieces that don’t want to come off easily. Once all of the cabinets have been demolished, use a utility knife to cut away any remaining caulking or sealant.
Step 5: Clean Up
The last step in demoing kitchen cabinets is to clean up the mess. Use a broom and dustpan to sweep up any debris that has been created. Put all of the debris in a trash bag and dispose of it properly. If there is any remaining caulking or sealant, use a damp cloth to remove it. Finally, vacuum the area to remove any dust or debris that may have been created during the demolition process.


Related Posts