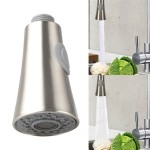
How to Repair a Leaking Delta Single Handle Kitchen Faucet
A leaky kitchen faucet is a common plumbing problem that can waste water and increase your utility bills. If you have a Delta single handle kitchen faucet that is leaking, you can repair it yourself with a few simple tools and supplies. Here's a step-by-step guide on how to do it:
Step 1: Gather your tools and materials
You will need the following tools and materials to repair your leaking Delta single handle kitchen faucet:
- Phillips head screwdriver
- Adjustable wrench
- Allen wrench (if applicable)
- New O-rings and washers
- Faucet lubricant
Step 2: Turn off the water supply
Before you begin any repairs, turn off the water supply to the faucet. There should be two shut-off valves under the sink, one for hot water and one for cold water. Turn both valves clockwise to turn off the water.
Step 3: Remove the handle
The handle is typically held in place by a screw or an Allen screw. Use the appropriate tool to remove the screw and pull the handle straight up to remove it.
Step 4: Remove the cartridge
Once the handle is removed, you will see the cartridge. The cartridge is held in place by a retaining nut. Use the adjustable wrench to loosen the retaining nut and remove it. Then, pull the cartridge straight up to remove it.
Step 5: Inspect the O-rings and washers
The O-rings and washers are small rubber seals that create a watertight seal between the cartridge and the faucet body. Inspect the O-rings and washers for any signs of wear or damage. If any of the O-rings or washers are damaged, they will need to be replaced.
Step 6: Lubricate the O-rings and washers
Apply a small amount of faucet lubricant to the new O-rings and washers. This will help to create a watertight seal and prevent leaks.
Step 7: Install the new O-rings and washers
Place the new O-rings and washers onto the cartridge. Make sure that the O-rings and washers are seated properly.
Step 8: Install the cartridge
Insert the cartridge into the faucet body. Push the cartridge down until it is fully seated. Then, tighten the retaining nut using the adjustable wrench.
Step 9: Install the handle
Place the handle onto the cartridge. Align the handle with the notch in the faucet body. Then, push the handle down until it is fully seated.
Step 10: Turn on the water supply
Turn on the water supply to the faucet. Check for leaks. If there are any leaks, tighten the retaining nut or replace the O-rings and washers as needed.
Congratulations! You have now successfully repaired your leaking Delta single handle kitchen faucet.

Fixing A Dripping Delta Single Handle Kitchen Faucet

How To Repair A Leaky Delta Faucet

How To Fix A Leaky Kitchen Faucet Featuring Delta Leland Single Handle Model 9178 Ar Dst

Fixing A Dripping Delta Single Handle Kitchen Faucet

How To Repair Leaking Dripping Delta Faucet Diyplumbing Serviceplumbing Tappplumbing

How To Fix A Leaky Delta Faucet Replacing Valve Cartridge On Single Handle Easy

How To Repair A Delta Brand Kitchen Faucet With Pictures

Delta Kitchen Faucet Leak Repair Single Handle

How To Rebuild A Delta Single Handle Faucet

How To Rebuild A Delta Single Handle Faucet
Related Posts