Before And After Kitchen Cabinets Painted White: A Transformation Guide
Kitchen cabinets often dictate the overall aesthetic of a kitchen. Over time, the original color of these cabinets can become dated, worn, or simply no longer align with the homeowner's desired style. Repainting kitchen cabinets, particularly in a classic color like white, is a cost-effective and impactful way to revitalize the space. This article explores the process of painting kitchen cabinets white, highlighting the dramatic before-and-after transformations achievable with careful preparation, appropriate materials, and meticulous execution.
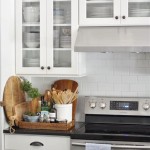
The appeal of white kitchen cabinets stems from their versatility and ability to brighten and enlarge the perceived space. White reflects light, making even smaller kitchens feel more open and airy. It also provides a neutral backdrop that complements various design styles, from traditional to modern, and allows for greater flexibility in choosing countertops, backsplashes, and appliances. Additionally, white cabinets tend to have a higher perceived market value, making repainting a worthwhile investment.
Key Point 1: Pre-Painting Preparation - The Foundation of a Lasting Finish
The success of any cabinet painting project hinges on thorough preparation. Neglecting this crucial step can lead to adhesion problems, uneven finishes, and a final result that is far from satisfactory. The preparation process involves several stages, each designed to ensure the paint adheres properly and the final finish is smooth and durable.
The first stage is careful removal. All doors, drawers, and hardware (hinges, knobs, pulls) must be removed. Labeling each item with its corresponding location is critical to ensure accurate reassembly. This is a simple step that saves significant time and frustration later in the project. It is recommended to use painter's tape and a permanent marker for clear labeling.
Following removal, the cleaning process begins. Kitchen cabinets are typically coated with grease, grime, and food splatters. A degreasing cleaner, such as TSP (trisodium phosphate) or a phosphate-free alternative, is essential for removing these contaminants. The cabinets should be thoroughly scrubbed, rinsed with clean water, and allowed to dry completely. For particularly stubborn grease, a second round of cleaning may be necessary.
Once the cabinets are clean and dry, sanding is the next critical step. Sanding creates a slightly rough surface that provides "tooth" for the primer and paint to adhere to. The appropriate grit of sandpaper depends on the existing finish. For glossy or heavily varnished cabinets, a coarser grit (around 120-150) is recommended to break through the existing finish. For cabinets with a less reflective finish, a finer grit (around 220) may suffice. Sanding should be done evenly, paying attention to edges and corners. After sanding, all dust must be removed with a tack cloth or a damp rag. A vacuum cleaner with a brush attachment can also be used to remove residual dust from crevices and hard-to-reach areas.
After sanding and cleaning, a final step before priming is patching any holes or imperfections. Wood filler is used to fill any nail holes, dents, or gouges. Once the wood filler is dry, it should be sanded smooth to blend seamlessly with the surrounding surface. Again, all dust must be removed before proceeding to the next step.
Key Point 2: The Importance of Priming and Paint Selection
Priming is an indispensable step in achieving a professional-looking finish on kitchen cabinets. Primer serves several crucial functions. It seals the existing finish, preventing bleed-through of stains or tannins. It also provides a uniform surface for the paint to adhere to, ensuring consistent color and sheen. Furthermore, primer can improve the adhesion of the paint, resulting in a more durable finish.
The choice of primer depends on the type of cabinet material and the existing finish. Oil-based primers are known for their excellent adhesion and stain-blocking properties. However, they require mineral spirits for cleanup and have a longer drying time. Water-based primers are easier to clean up and have lower VOC (volatile organic compound) emissions, making them a more environmentally friendly option. Shellac-based primers are excellent for blocking stubborn stains and sealing knots in wood. Ultimately, the best primer for a particular project depends on the specific needs of the cabinets.
Applying the primer requires the same care and attention as applying the paint. Use a high-quality brush, roller, or sprayer to apply a thin, even coat of primer. Avoid drips and runs. Allow the primer to dry completely according to the manufacturer's instructions. Once the primer is dry, lightly sand it with fine-grit sandpaper (around 320) to create an even smoother surface for the paint. Remove all dust before proceeding to the paint.
The selection of paint is equally important. For kitchen cabinets, a durable and washable paint is essential. Semi-gloss or satin finishes are popular choices because they are easy to clean and resist moisture. Alkyd paints, which are oil-based, are known for their durability and smooth finish. However, they require mineral spirits for cleanup and have a longer drying time. Acrylic latex paints are water-based and offer good durability and ease of cleanup. They are also available in low-VOC formulations, making them a more environmentally friendly option. Cabinet-specific paints are also available, formulated for enhanced durability and adhesion on cabinet surfaces.
When selecting a white paint, consider the undertones. White is not a single color; it comes in a variety of shades with different undertones, such as warm (yellow or red undertones) and cool (blue or gray undertones). Choosing the right white depends on the overall color scheme of the kitchen and the desired aesthetic. Consider the natural lighting in the kitchen and how it will affect the perceived color of the paint. Sampling different shades of white in the kitchen before committing to a final color is recommended.
Key Point 3: Application Techniques and Final Touches
The application technique significantly impacts the final appearance of the painted cabinets. There are three primary methods for applying paint: brush, roller, and sprayer. Each method has its advantages and disadvantages.
Brushing is the most traditional method and is suitable for smaller projects or intricate details. Use a high-quality brush with synthetic bristles designed for the type of paint being used. Apply the paint in thin, even strokes, following the grain of the wood. Avoid overloading the brush, which can lead to drips and runs. "Tipping off" the paint, which involves lightly running the brush over the wet paint to smooth out brushstrokes, can improve the final finish.
Rolling is a faster method than brushing and is suitable for larger, flat surfaces. Use a high-density foam roller or a microfiber roller for a smooth finish. Apply the paint in thin, even coats, overlapping each stroke slightly. Avoid pressing too hard on the roller, which can create bubbles or uneven texture. A combination of brushing and rolling can be used, with brushing for edges and details and rolling for larger surfaces.
Spraying is the most efficient method for achieving a professional-looking finish. A paint sprayer atomizes the paint into a fine mist, resulting in a smooth, even coat with minimal brushstrokes or roller marks. However, spraying requires more preparation and skill. The surrounding area must be masked off to protect it from overspray. Proper ventilation is essential, and a respirator should be worn to protect from inhaling paint fumes. The paint must be thinned according to the manufacturer's instructions to achieve the correct viscosity for spraying. Several thin coats of paint are typically required to achieve full coverage.
Regardless of the application method, multiple thin coats of paint are preferable to one thick coat. Thick coats of paint are more prone to drips, runs, and sagging. Allow each coat of paint to dry completely according to the manufacturer's instructions before applying the next coat. Lightly sanding between coats with fine-grit sandpaper (around 320-400) can further improve the smoothness of the finish.
Once the final coat of paint is dry, the hardware can be reinstalled. Clean the original hardware or replace it with new hardware to update the look of the cabinets. Carefully reattach the doors and drawers, ensuring they are properly aligned. Adjust the hinges if necessary to ensure the doors swing smoothly and close properly.
The final step is to inspect the cabinets for any imperfections. Touch up any areas that need attention with a small brush. Allow the paint to fully cure according to the manufacturer's instructions before using the cabinets. This typically takes several days or even weeks. The transformation from dated or worn cabinets to freshly painted white cabinets can dramatically improve the appearance and value of a kitchen. The key to success lies in meticulous preparation, careful application, and attention to detail.

Update On Our Diy White Painted Kitchen Cabinets 2 Years Later

Our Painted Cabinets Five Years Later Nina Hendrick Home

Painted Cabinets Nashville Tn Before And After Photos Brown Kitchen Painting White
How To Paint Fake Wood Kitchen Cabinets Simple Made Pretty 2024

White Painted Kitchen Cabinet Reveal With Before And After Photos 365 Days Of Slow Cooking Pressure

Painted Kitchen Cabinet Ideas And Makeover Reveal The Polka Dot Chair

Ask Maria Help My White Painted Kitchen Cabinets Look Bad Advice For Homeowners

Painting Kitchen Cabinets White Before And After Makeover Simple

Painted Cabinets Nashville Tn Before And After Photos

Pa Wedding Photographer Diy Painted Kitchen Cabinets Before After
Related Posts