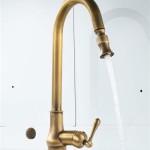
How to Repair a Dripping Delta Kitchen Faucet
A dripping kitchen faucet can be a frustrating and wasteful issue. Not only can it create a constant annoyance, but it can also lead to increased water bills. Fortunately, repairing a dripping Delta kitchen faucet is a relatively simple task that can be completed in just a few minutes with the right tools and instructions.
In this article, we will provide step-by-step instructions on how to repair a dripping Delta kitchen faucet. We will cover the most common causes of a dripping faucet and provide solutions for each.
1. Check the Aerator
The aerator is a small device located at the tip of the faucet that helps to create a smooth, even stream of water. Over time, the aerator can become clogged with mineral deposits, which can cause the faucet to drip. To clean the aerator, simply unscrew it from the faucet and soak it in a solution of vinegar and water. Once the aerator is clean, reattach it to the faucet and check for leaks.
2. Replace the O-Rings
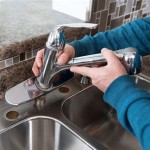
O-rings are small rubber gaskets that create a seal between the faucet handle and the faucet body. Over time, O-rings can become worn or damaged, which can cause the faucet to leak. To replace the O-rings, you will need to remove the faucet handle. Once the handle is removed, you can access the O-rings and replace them with new ones.
3. Tighten the Packing Nut
The packing nut is a large nut that is located at the base of the faucet handle. Tightening the packing nut can help to stop a leak from around the handle. To tighten the packing nut, simply use a wrench to turn it clockwise. Be careful not to overtighten the packing nut, as this can damage the faucet.
4. Replace the Cartridge
The cartridge is a small, cylindrical device that controls the flow of water through the faucet. If the cartridge is worn or damaged, it can cause the faucet to leak. To replace the cartridge, you will need to remove the faucet handle and the packing nut. Once the packing nut is removed, you will be able to access the cartridge and replace it with a new one.
5. Call a Plumber
If you have tried all of the above steps and the faucet is still dripping, you may need to call a plumber. A plumber can diagnose the problem and make the necessary repairs.
Conclusion
Repairing a dripping Delta kitchen faucet is a relatively simple task that can be completed in just a few minutes with the right tools and instructions. By following the steps outlined in this article, you can save yourself the time and expense of calling a plumber.

How To Repair A Leaky Delta Faucet

How To Repair Leaking Dripping Delta Faucet Diyplumbing Serviceplumbing Tappplumbing

How To Repair A Dripping Delta Faucet

Delta Kitchen Faucet Leak Repair Single Handle

How To Fix A Double Handle Delta Kitchen Sink Faucet Leak

Fixing A Dripping Delta Single Handle Kitchen Faucet Est House On The Block

Fixing A Dripping Delta Single Handle Kitchen Faucet Est House On The Block

Repair Delta Dripping Leaking Kitchen Faucet

Fix Leaking Or Dripping Kitchen Faucet Single Handle Delta Rless

How To Repair Leaky Kitchen Faucet
Related Posts