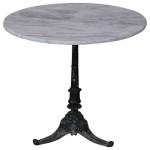
DIY Kitchen Table Top Ideas: Transforming Your Space
The kitchen table often serves as the central hub of a home. It’s a space for meals, conversations, homework, and various other activities. Over time, a kitchen table top can become worn, outdated, or simply not suit evolving aesthetic preferences. Replacing the entire table can be costly and wasteful. A more economical and environmentally conscious approach is to replace or refinish the table top. This article explores various DIY kitchen table top ideas, providing guidance on materials, techniques, and considerations for creating a functional and visually appealing surface.
Material Selection: The Foundation of Your DIY Table Top
Choosing the right material is paramount for a successful DIY kitchen table top project. The material dictates the table's durability, appearance, and maintenance requirements. Several options are available, each with its unique characteristics:
Solid Wood: Solid wood offers warmth, durability, and a timeless aesthetic. Common choices include maple, oak, cherry, and walnut. Maple and oak are particularly durable and suitable for high-traffic kitchens. Cherry and walnut provide a richer, more luxurious appearance but may require more careful maintenance. When selecting solid wood, consider the grain pattern, color variations, and hardness. Harder woods resist scratches and dents better than softer woods. Sourcing wood from reputable suppliers ensures quality and sustainability. Reclaimed wood is also a popular option, adding character and contributing to environmental conservation. However, reclaimed wood often requires significant preparation, including cleaning, sanding, and filling imperfections.
Butcher Block: Butcher block is constructed from strips of wood glued together, creating a robust and visually appealing surface. It is frequently used for kitchen islands and countertops due to its durability and ability to withstand heavy use. Butcher block can be made from various wood species, including maple, oak, and birch. Maple butcher block is particularly popular due to its hardness and resistance to moisture. Regular oiling with food-safe mineral oil is essential to maintain the butcher block's integrity and prevent drying or cracking. Butcher block adds a rustic and functional element to the kitchen, making it suitable for both food preparation and dining.
Plywood: Plywood offers a cost-effective alternative to solid wood. It consists of layers of wood veneer glued together, providing strength and stability. When using plywood for a kitchen table top, it is crucial to select a high-quality grade with a smooth surface. Applying edge banding, which involves attaching thin strips of wood to the exposed edges, enhances the appearance and prevents damage to the plywood's core. Plywood can be painted, stained, or covered with a laminate or veneer to achieve the desired aesthetic. Proper sealing is necessary to protect the plywood from moisture and prevent warping or delamination.
Laminate: Laminate table tops are constructed from layers of paper and resin, bonded to a particleboard or MDF core. Laminate is known for its durability, resistance to scratches and stains, and ease of cleaning. It is available in a wide range of colors, patterns, and textures, allowing for diverse design options. Laminate is a budget-friendly choice and requires minimal maintenance. However, laminate can be susceptible to chipping or peeling if not properly installed or maintained. Choosing a high-quality laminate with a strong adhesive is essential for long-term durability. Laminate is a practical solution for busy kitchens where spills and messes are common.
Epoxy Resin: Epoxy resin is a versatile material that can be used to create unique and visually striking table tops. It involves pouring a mixture of resin and hardener over a base material, such as wood or plywood. Epoxy resin can be colored with pigments, dyes, or other additives to create a custom look. It offers a durable, waterproof, and heat-resistant surface. Epoxy resin is often used in conjunction with wood to create "river tables," where the resin mimics the appearance of a flowing river. Working with epoxy resin requires careful planning and attention to detail. Proper ventilation and safety precautions are essential due to the chemical nature of the materials involved.
Tile: Tile can be used to create a durable, heat-resistant, and aesthetically pleasing kitchen table top. Ceramic, porcelain, and natural stone tiles are all viable options. Tile offers a wide range of colors, patterns, and sizes, allowing for creative design possibilities. Grouting is essential to seal the spaces between the tiles and prevent water damage. Epoxy grout is a more durable and stain-resistant option compared to traditional cement grout. Tile table tops can be heavy, so a sturdy base is necessary to support the weight. Tile adds a touch of elegance and sophistication to the kitchen, making it suitable for both formal and informal dining areas.
Preparation and Construction Techniques: Building Your Table Top
Proper preparation and construction techniques are critical for achieving a professional-looking and durable kitchen table top. This section outlines the key steps involved in building a DIY table top:
Measuring and Cutting: Accurate measurements are essential for ensuring that the table top fits the existing table base or frame. Use a high-quality measuring tape and double-check all measurements before cutting. When cutting the material, use appropriate tools and techniques to achieve clean, straight edges. For solid wood and plywood, a circular saw or table saw is commonly used. For laminate, a scoring tool and utility knife may be necessary. For tile, a wet saw is required to cut the tiles to the desired size and shape. Always wear safety glasses and other appropriate personal protective equipment when using power tools.
Sanding and Finishing: Sanding is crucial for creating a smooth surface and preparing the material for finishing. Start with a coarse grit sandpaper (e.g., 80-grit) to remove any imperfections or blemishes. Gradually progress to finer grits (e.g., 120-grit, 220-grit) to achieve a smooth, polished surface. For solid wood, sanding with the grain is essential to prevent scratches. For plywood, be careful not to sand through the veneer layer. After sanding, remove all dust and debris with a tack cloth or vacuum. Applying a finish protects the material from moisture, stains, and scratches. Common finishes include varnish, polyurethane, lacquer, and oil-based finishes. Apply multiple coats of finish, allowing each coat to dry completely before applying the next. Lightly sand between coats to create a smooth, even surface.
Edge Banding (For Plywood): Edge banding is necessary for plywood table tops to cover the exposed edges and prevent damage to the core. Edge banding can be made from wood veneer, plastic, or metal. Apply edge banding with a heat-activated adhesive using an iron or edge banding machine. Trim any excess edge banding with a utility knife or edge trimmer tool. Sand the edges smooth and apply a finish to match the table top.
Adhering Laminate: Adhering laminate to a substrate requires careful preparation and the use of a strong adhesive. Cut the laminate slightly larger than the substrate to allow for trimming. Apply contact cement to both the laminate and the substrate. Allow the contact cement to dry completely before bonding the two surfaces together. Use a roller or press to ensure a strong bond. Trim any excess laminate with a router or laminate trimmer. File the edges smooth and apply edge banding if desired.
Installing Tile: Installing tile requires a level surface and the use of thin-set mortar. Apply thin-set mortar to the substrate with a notched trowel. Set the tiles in place, pressing them firmly into the mortar. Use tile spacers to maintain consistent spacing between the tiles. Allow the mortar to dry completely before grouting. Apply grout to the spaces between the tiles, using a grout float to push the grout into the joints. Wipe away any excess grout with a damp sponge. Allow the grout to cure completely before sealing.
Epoxy Resin Application: Working with epoxy resin requires careful planning and preparation. Ensure that the work area is well-ventilated and wear appropriate safety gear, including gloves and a respirator. Mix the resin and hardener according to the manufacturer's instructions. Pour the resin over the base material, ensuring that it covers the entire surface. Use a heat gun or torch to remove any air bubbles. Allow the resin to cure completely before sanding and polishing. Multiple coats of resin may be necessary to achieve the desired thickness and clarity.
Design Considerations and Customization Options: Personalizing Your Table Top
Beyond material selection and construction techniques, design considerations are crucial for creating a kitchen table top that complements the existing decor and meets specific needs. Customization options allow for personalization and the creation of a unique piece:
Shape and Size: The shape and size of the table top should be appropriate for the size of the kitchen and the number of people who will typically use the table. Common shapes include rectangular, square, round, and oval. Rectangular tables are suitable for larger kitchens and can accommodate more people. Square tables are ideal for smaller spaces. Round tables promote conversation and create a more intimate dining experience. Oval tables offer a compromise between rectangular and round shapes. The size of the table top should allow for comfortable seating and adequate space for place settings and serving dishes.
Edge Profiles: The edge profile of the table top can significantly impact its appearance and functionality. Common edge profiles include square, rounded, beveled, and ogee. Square edges are simple and modern. Rounded edges are softer and more forgiving. Beveled edges add a touch of elegance. Ogee edges are more ornate and traditional. The choice of edge profile should complement the overall style of the kitchen.
Color and Finish: The color and finish of the table top should coordinate with the existing cabinetry, flooring, and other design elements in the kitchen. Light colors can brighten up a small kitchen and create a more spacious feel. Dark colors can add warmth and sophistication to a larger kitchen. Natural wood finishes showcase the beauty of the wood grain. Painted finishes offer a wide range of color options. The choice of finish should also consider the durability and maintenance requirements of the material.
Inlays and Accents: Inlays and accents can add visual interest and personalize the table top. Inlays can be made from contrasting wood species, metal, or other materials. Accents can include decorative tiles, mosaic patterns, or hand-painted designs. Inlays and accents should be carefully planned and executed to create a cohesive and aesthetically pleasing design.
Resin Art and Embedments: When using epoxy resin, incorporate various elements into the resin for a truly unique table top. Dried flowers, stones, shells, or other decorative items can be embedded in the resin to create a custom design. Pigments, dyes, and metallic powders can be added to the resin to create vibrant colors and textures. Experiment with different techniques to create a one-of-a-kind piece of art.
Combining Materials: Explore the possibility of combining different materials in the table top design. For example, a wood table top with a tile inlay or a laminate table top with a wood edge. Combining materials can add visual interest and create a unique and personalized look.

20 Gorgeous Diy Dining Table Ideas And Plans The House Of Wood

10 Diy Dining Table Ideas Build Your Own Room

Diy Zinc Top Kitchen Table Beneath My Heart

10 Diy Dining Table Ideas Build Your Own

My Favorite Diy Kitchen Table Ideas Buy This Cook That

Pin On Hunny Do Togethers

25 Table Top Ideas To Try This Weekend Mod Podge Rocks

25 Table Top Ideas To Try This Weekend Mod Podge Rocks

My Favorite Diy Kitchen Table Ideas Buy This Cook That

Beautiful Dining Table Top Ideas For All One Brick At A Time
Related Posts

