How To Replace A Fluorescent Light Fixture In Your Kitchen
Fluorescent light fixtures are commonly found in kitchens, providing bright and efficient illumination for cooking and other tasks. Over time, these fixtures can become outdated, damaged, or simply stop working. Replacing a fluorescent fixture is a manageable DIY project for individuals with basic electrical knowledge and skills. This article provides a comprehensive guide to safely and effectively replacing a fluorescent light fixture in a kitchen.
Before commencing any electrical work, safety is paramount. It is imperative to understand the risks involved and take the necessary precautions to prevent electrical shock or other injuries. The first and most crucial step is to disconnect the power supply to the fixture at the circuit breaker. Locate the breaker that controls the kitchen lighting circuit and flip it to the "off" position. To ensure the power is completely off, test the fixture with a non-contact voltage tester. This device will indicate the presence of electricity without requiring direct contact with the wiring. If the tester indicates voltage, double-check that the correct breaker is switched off. If unsure, it is advised to switch off the main breaker to the entire house during the replacement process.
Gather all the necessary tools and materials before beginning the dismantling process. Essential tools include a screwdriver set (both flathead and Phillips head), wire strippers, wire connectors (wire nuts), a non-contact voltage tester, safety glasses, gloves (optional but recommended), and a ladder or step stool to reach the fixture. The replacement fixture should be selected based on the desired lighting output, aesthetic preferences, and compatibility with the existing electrical wiring. Check the dimensions of the old fixture and the space available to ensure the new fixture fits properly. Verify that the new fixture is also suitable for kitchen environments, which may involve considerations for moisture resistance or compatibility with kitchen exhaust systems. Have all these materials readily available, so that you can work efficiently, and without unnecessary interruption.
Key Point 1: Preparation and Safety Precautions
Prior to physically interacting with the existing fixture, a careful examination is required to understand its construction and wiring configuration. Begin by removing the light diffuser or lens, which is typically held in place by clips, screws, or a twist-lock mechanism. Once removed, the fluorescent tubes will be accessible. Carefully remove the tubes by twisting them a quarter turn and then gently pulling them out of the sockets. These tubes may contain a small amount of mercury and should be handled with care. It is recommended to recycle used fluorescent tubes at a designated recycling center to prevent environmental contamination. Avoid breaking the tubes, and store them safely away from children and pets until they can be properly disposed of.
With the tubes removed, the internal components of the fixture, including the ballast and wiring, will be visible. The ballast is a device that regulates the voltage and current to the fluorescent tubes. It is often attached to the fixture with screws or rivets. Take a photograph or draw a diagram of the wiring connections before disconnecting anything. This will serve as a reference when wiring the new fixture. Note the color of each wire and its corresponding terminal. Typically, fluorescent fixtures use black (hot), white (neutral), and green or bare copper (ground) wires. Carefully detach the wires from the existing fixture using wire strippers and wire connectors. Unscrew the wire connectors and gently pull the wires apart. If the wires are corroded or damaged, cut them back to expose fresh wire before re-connecting them.
After disconnecting the wiring, the fixture can be detached from the ceiling or mounting surface. Depending on the installation method, the fixture may be attached with screws, bolts, or mounting brackets. Locate the fasteners and carefully remove them using the appropriate screwdriver or wrench. Support the fixture with one hand while removing the final fasteners to prevent it from falling. Lower the fixture gently and set it aside.
Inspect the junction box in the ceiling for any damage or loose connections. The junction box is a metal or plastic enclosure that houses the electrical wiring. Ensure that the wires are securely connected to the box and that there are no signs of corrosion or damage. If the junction box is damaged, it may need to be replaced before installing the new fixture. This is a critical step to ensure the electrical integrity and safety of the installation.
Key Point 2: Removing the Old Fixture
With the old fixture removed, prepare the area for the installation of the new fixture. If necessary, patch any holes or imperfections in the ceiling using drywall compound and sandpaper. Clean the surface to remove any dust or debris. Ensure that the junction box is properly secured to the ceiling and that the wires are accessible.
Carefully unpack the new fluorescent light fixture and inspect it for any damage. Read the manufacturer's instructions thoroughly before proceeding with the installation. Familiarize yourself with the fixture's components, mounting hardware, and wiring diagram. Some fixtures may require assembly before installation, such as attaching mounting brackets or installing the ballast.
Position the new fixture against the ceiling and align it with the junction box. Secure the fixture to the ceiling using the appropriate mounting hardware. The specific mounting method will vary depending on the type of fixture and the construction of the ceiling. Some fixtures may be attached with screws that thread directly into the junction box, while others may require the use of mounting brackets or straps. Ensure that the fixture is securely fastened and that it is level.
Connect the electrical wiring of the new fixture to the wires in the junction box. Match the colors of the wires: black to black (hot), white to white (neutral), and green or bare copper to green or bare copper (ground). Use wire connectors to securely join the wires. Twist the wires together clockwise and then screw on the wire connector until it is snug but not overtightened. Gently tug on each wire to ensure that the connection is secure. Properly connected wires are essential for safe and reliable operation of the new fixture.
Once the wiring is complete, carefully tuck the wires into the junction box. Ensure that the wires are not pinched or crimped. Position the fixture so that it covers the junction box and conceals the wiring. If necessary, use additional screws or fasteners to secure the fixture to the ceiling.
Key Point 3: Installing the New Fixture
After securely mounting the new light fixture and connecting the electrical wiring, the fluorescent tubes can be installed. Handle the tubes carefully to avoid breakage. Orient the tubes correctly according to the fixture's design. Typically, the tubes are inserted into the sockets at each end and then twisted a quarter turn to lock them in place. Ensure that the tubes are securely seated in the sockets and that they are properly aligned.
Once the tubes are installed, the light diffuser or lens can be attached. Align the diffuser or lens with the fixture and secure it using the clips, screws, or twist-lock mechanism. Ensure that the diffuser or lens is properly seated and that it is securely fastened to prevent it from falling.
After completing the installation, restore power to the circuit by turning the circuit breaker back to the "on" position. Test the new fixture to ensure that it is working properly. Turn on the light switch and verify that the fixture illuminates immediately. If the fixture does not turn on, double-check the wiring connections and the tube installation. If the fixture flickers or hums, this may indicate a problem with the ballast or the tubes. Consult the manufacturer's instructions for troubleshooting tips.
Inspect the installation for any signs of potential hazards, such as loose wires, exposed connections, or overheating. Correct any issues immediately. If you are not comfortable troubleshooting electrical problems, consult a qualified electrician.
Finally, clean up the work area and dispose of any debris, such as old fixture components, packaging materials, and wire scraps. Store the tools and materials in a safe and organized manner. Following these steps will ensure the safe, and effective replacement of a fluorescent light fixture in the kitchen, providing reliable lighting for years to come.
Following completion of the light fixture installation, it is advisable to periodically inspect the fixture to ensure it remains in good working order. This includes visually examining the fixture for any signs of damage, such as cracks, discoloration, or corrosion. Check the wiring connections to ensure they are secure and that no wires are exposed. Clean the fixture regularly to remove dust and debris, which can reduce light output and increase the risk of overheating.
Regularly replace the fluorescent tubes as they reach the end of their lifespan. Over time, the tubes will dim and produce less light. Replacing the tubes will maintain optimal lighting performance and improve energy efficiency. Consult the manufacturer's instructions for the recommended replacement interval. When replacing the tubes, always disconnect the power to the fixture at the circuit breaker to prevent electrical shock.
Consider upgrading to LED lighting. LED light fixtures are more energy-efficient, are rated for far longer lifespans, and often provide superior light quality than traditional fluorescent fixtures. LED conversions often require replacing the entire fluorescent fixture, and is a worthwhile long-term investment that can reduce energy costs and maintenance requirements.

How To Replace An Old Fluorescent Light Fixture Young House Love

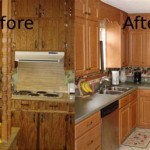
Removing A Fluorescent Kitchen Light Box The Kim Six Fix

How To Replace An Old Fluorescent Light Fixture Young House Love

How To Replace An Old Fluorescent Light Fixture Young House Love

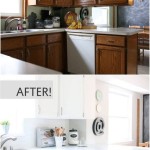
Replacing Fluorescent Light Boxes In Your Kitchen My Design Rules

How To Replace An Old Fluorescent Light Fixture Young House Love

How To Remove Fluorescent Light Fixtures

Home Electrical Repairs How To Replace The Lens For Light Fixtures

How To Replace An Old Fluorescent Light Fixture Young House Love

Replacing Fluorescent Light Boxes In Your Kitchen My Design Rules
Related Posts