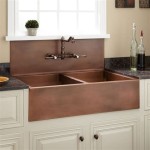
How To Do Your Own Kitchen Cabinets: A Comprehensive Guide
Undertaking a kitchen cabinet project is a significant home improvement task that can dramatically transform the functionality and aesthetic appeal of a kitchen. While professional installation offers convenience and often guarantees quality, completing the project independently provides a cost-effective alternative and a sense of personal accomplishment. This article provides a comprehensive guide to installing kitchen cabinets, covering planning, preparation, demolition, installation, and finishing touches, equipping individuals with the knowledge necessary to navigate this challenging yet rewarding endeavor.
Planning and Preparation: Setting the Foundation for Success
The initial phase of any kitchen cabinet installation involves meticulous planning and preparation. This stage is crucial for minimizing potential complications and ensuring a smooth installation process.
The first step is to accurately measure the kitchen space. Precise measurements of wall lengths, ceiling height, and the placement of existing appliances, plumbing fixtures, and electrical outlets are essential. These measurements will dictate the cabinet layout and prevent unforeseen fit issues during installation.
Next, create a detailed kitchen design. Several online and software-based tools can assist in visualizing different cabinet configurations and layouts. Consider factors such as workflow efficiency, storage capacity, and the overall aesthetic you wish to achieve. Determine the desired placement of base cabinets, wall cabinets, and any specialty cabinets like pantries or corner units.
Once the design is finalized, procure the necessary materials and tools. This includes the cabinets themselves, which can be purchased pre-assembled or as flat-pack units requiring assembly. Gather essential tools such as a stud finder, level, measuring tape, drill, screwdriver, circular saw (if modifications are needed), shims, safety glasses, and work gloves. In addition to cabinets and tools, acquire necessary hardware, including screws, nails, cabinet pulls, and hinges, if not already included with the cabinets.
Before starting the demolition phase, disconnect all utilities. Turn off the water supply to the sink and disconnect any electrical wiring to appliances or outlets that will be affected by the cabinet removal. This step is paramount for safety and prevents potential hazards during the demolition process.
Finally, protect the work area by covering floors with drop cloths and masking off walls to prevent scratches and dents. This will minimize cleanup efforts and maintain the integrity of the surrounding surfaces.
Demolition and Removal: Clearing the Space for New Cabinets
The next phase involves removing the existing kitchen cabinets. This process requires careful execution to avoid damaging the surrounding walls, flooring, or plumbing.
Begin by emptying all the existing cabinets and drawers. This will lighten the load and prevent items from being damaged during removal.
Use a utility knife to cut any caulk or sealant along the edges of the cabinets where they meet the walls or countertops. This will help to release the cabinets without tearing the drywall.
Locate and remove the screws or fasteners that secure the cabinets to the walls and floor. Use a drill or screwdriver to remove the screws, working methodically to avoid stripping the screw heads.
Once the cabinets are detached, carefully lift them off the walls. Enlist assistance for heavier cabinets to prevent injury. Disconnect any plumbing or electrical connections to the sink or appliances before fully removing the cabinets.
After removing the cabinets, inspect the walls for any damage. Repair any holes or cracks in the drywall and ensure the surface is clean and level before proceeding with the installation.
Remove the old countertops. This may involve disconnecting the sink and disconnecting any plumbing lines. Dispose of the old cabinets and countertops in accordance with local regulations.
Installation: Assembling and Mounting the Cabinets
Following the demolition and preparation, the installation phase begins. This requires precision and attention to detail to ensure the cabinets are level, secure, and properly aligned.
Begin by locating the wall studs using a stud finder. Mark the stud locations on the walls, as these will serve as anchor points for the cabinets. Ensure the stud finder is properly calibrated and that the markings are accurate.
Install a ledger board along the wall at the height where the base cabinets will sit. This board provides temporary support while the base cabinets are leveled and secured. The ledger board should be level and securely attached to the wall studs.
Start with the corner base cabinet, if applicable. Position the cabinet in place and use shims to level it both horizontally and vertically. Once the cabinet is level, secure it to the wall studs using screws.
Proceed with installing the remaining base cabinets, working outwards from the corner. Ensure each cabinet is level and aligned with the adjacent cabinets. Use clamps to hold the cabinets together while securing them to the wall studs.
After the base cabinets are installed, remove the ledger board and begin installing the wall cabinets. Use a similar process to level and secure the wall cabinets to the wall studs. Ensure the wall cabinets are aligned with the base cabinets and that the spacing between the cabinets is consistent.
Drill pilot holes before driving screws to prevent splitting the wood. Utilize a level frequently to ensure proper alignment. Work methodically and double-check measurements at each stage.
Once all the cabinets are installed, check for any gaps or misalignment. Use shims to correct any imperfections and ensure the cabinets are flush against the walls.
Install the countertops. Depending on the material of the countertops, this might involve professional installation. If installing laminate countertops, follow the manufacturer's instructions carefully. Secure the countertops to the base cabinets using screws or adhesive.
Finishing Touches: Completing the Installation and Enhancing Aesthetics
After the cabinets are installed, the finishing touches will enhance the appearance and functionality of the kitchen.
Install cabinet doors and drawers. Ensure the doors and drawers are properly aligned and that they open and close smoothly. Adjust the hinges as needed to achieve proper alignment.
Install cabinet pulls and knobs. These hardware elements will add a decorative touch and improve the usability of the cabinets. Follow the manufacturer's instructions for installation, ensuring the pulls and knobs are properly aligned.
Apply caulk along the edges of the cabinets where they meet the walls and countertops. This will seal any gaps and prevent moisture from entering the cabinets. Use a high-quality caulk that is paintable and resistant to mildew.
Install shelving and organizers inside the cabinets. This will maximize storage space and improve the organization of the kitchen. Consider installing pull-out shelves, spice racks, and other organizers to make the most of the available space.
Install under-cabinet lighting. This will provide additional task lighting and enhance the ambiance of the kitchen. Consider installing LED strip lighting for energy efficiency and long lifespan.
Clean up the work area. Remove any debris, dust, and paint splatters. Dispose of all construction materials properly. A thorough cleaning will leave the kitchen looking fresh and new.
Inspect the completed installation. Check for any loose screws, misaligned doors, or other imperfections. Make any necessary corrections to ensure the cabinets are properly installed and functioning properly.
Installing kitchen cabinets is a challenging but achievable project for homeowners with basic carpentry skills. By following these steps carefully, individuals can transform their kitchen into a functional and beautiful space.

Diy Kitchen Cabinets Made From Only Plywood

How To Make Diy Kitchen Cabinets

How To Build Kitchen Cabinets Start Finish

Diy Budget Open Kitchen Cabinets Build Your Own In A Weekend

Diy Budget Open Kitchen Cabinet You Can Build In A Weekend The Ponds Farmhouse

Diy Kitchen Cabinet Ideas For Your Remodel

How To Diy Build Your Own White Country Kitchen Cabinets

How To Diy Build Your Own White Country Kitchen Cabinets

How To Build Your Own Kitchen Cabinets With Pictures Instructables

How To Diy Build Your Own White Country Kitchen Cabinets
Related Posts


