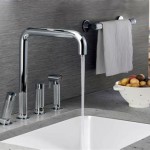
A kitchen faucet is an important part of any kitchen and is often used multiple times a day. Unfortunately, it can be prone to leaking and other issues that may need to be addressed. Fortunately, there are some simple steps you can take to fix a kitchen faucet on your own, without the need for a professional plumber.
Step 1: Shut Off the Water
Before you begin any work on a kitchen faucet, you need to make sure that the water is shut off. This is done by turning off the shut-off valves under the sink. If you are unsure of where the shut-off valves are located, you can refer to the user manual that came with the faucet.
Step 2: Remove the Handle
Once the water is shut off, you can begin to remove the handle. The handle is usually held in place with one or two screws. Unscrew the screws and then gently pull the handle off the faucet. It may be necessary to use a wrench to loosen the screws.
Step 3: Inspect the O-Ring and Gaskets
Once the handle is removed, you can inspect the O-ring and gaskets. The O-ring is a rubber seal that is located between the handle and the faucet body. If the O-ring is cracked or worn, it should be replaced. The gaskets are located at the base of the faucet and should be examined for any signs of wear or leakage.
Step 4: Replace the O-Ring and Gaskets
If the O-ring or gaskets need to be replaced, you can purchase them from a local hardware store. Once you have the new parts, you can remove the old parts and replace them with the new ones. Make sure to tighten the screws securely to ensure a secure fit.
Step 5: Reattach the Handle
Once the O-ring and gaskets have been replaced, you can reattach the handle. Place the handle on the faucet body and then tighten the screws with a wrench. Make sure that the handle is securely attached before you turn the water back on.
Step 6: Turn On the Water and Test the Faucet
Once the handle has been reattached, it is time to turn the water back on. Slowly turn the shut-off valves back on and then test the faucet. Make sure that the faucet is working properly and that there are no leaks. If all is working correctly, your kitchen faucet should be good to go.


Related Posts


