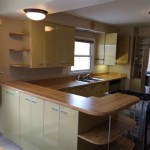
How To Reface Kitchen Cabinets: DIY Ideas
Refacing kitchen cabinets offers a cost-effective alternative to replacing them entirely, providing a fresh, updated look without the significant expense and disruption of a full remodel. This DIY project involves replacing the existing cabinet doors and drawer fronts, covering the exposed cabinet frames with a new veneer, and updating the hardware. The process allows homeowners to modernize their kitchen's aesthetic while retaining the existing cabinet boxes, saving both time and money.
Successfully refacing cabinets requires careful planning, precise execution, and attention to detail. The quality of the materials used directly impacts the longevity and appearance of the finished project. This article will explore various DIY refacing methods, materials, and considerations, enabling homeowners to approach this project with confidence and achieve professional-looking results.
Preparing for the Refacing Project
Proper preparation is paramount for a successful cabinet refacing endeavor. The initial step involves a thorough assessment of the existing cabinets to determine their suitability for refacing. Cabinets with significant structural damage, such as warped or rotting boxes, may require replacement rather than refacing. Additionally, the layout and functionality of the existing cabinets should be evaluated to ensure they meet the homeowner's needs before committing to the project.
Once the cabinets are deemed suitable, the next step is to carefully remove all existing cabinet doors, drawer fronts, hinges, knobs, and pulls. Labeling each door and drawer front as it is removed, along with its corresponding cabinet box, is crucial for reinstallation later. This process avoids confusion and ensures that each component is returned to its original location.
After removing the hardware and doors, the cabinet frames must be thoroughly cleaned. Use a degreasing cleaner to remove any grease, dirt, or grime that may have accumulated over time. This ensures proper adhesion of the new veneer. Minor imperfections, such as scratches or dents, should be filled with wood filler and sanded smooth to create a uniform surface for the veneer application.
Finally, thoroughly inspect the exposed cabinet boxes to ensure they are structurally sound. Reinforce any weak spots with wood glue and screws as needed. This ensures that the refaced cabinets will be durable and long-lasting.
Veneer Application Techniques
Veneer is the primary material used to cover the exposed cabinet frames during the refacing process. Several veneer options are available, including wood veneer, peel-and-stick veneer, and laminate veneer. Each type has its own advantages and disadvantages, depending on the homeowner's budget, skill level, and desired aesthetic.
Wood veneer offers a natural wood appearance and can be stained or painted to match the new cabinet doors. It typically requires the application of contact adhesive and careful trimming for a seamless finish. Peel-and-stick veneer is a more user-friendly option, featuring an adhesive backing that simplifies the application process. However, its durability and aesthetic appeal may not match that of wood veneer.
Laminate veneer is a durable and cost-effective option, offering a wide range of colors and patterns. It is typically applied using contact adhesive and requires precise trimming to achieve a professional look. Whichever veneer type is chosen, accurate measurements and precise cuts are essential for a flawless finish.
When applying the veneer, start by measuring and cutting the pieces to the exact dimensions of the cabinet frames. Apply contact adhesive to both the back of the veneer and the cabinet frame, allowing it to become tacky before carefully aligning and attaching the veneer. Use a roller or veneer scraper to apply even pressure and ensure proper adhesion. Trim any excess veneer with a utility knife or veneer saw, and sand the edges smooth for a clean, professional look.
When dealing with edges, the veneer should be applied carefully to avoid any bubbling or wrinkling. Miter the corners for a professional appearance, ensuring the seams are tight and seamless. For inside corners, a flexible veneer can be used to conform to the shape. The process should be repeated for all exposed surfaces of the cabinet frames, creating a uniform and visually appealing finish.
Selecting and Installing New Cabinet Doors and Hardware
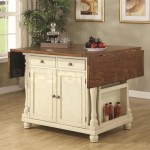
Choosing new cabinet doors and drawer fronts is a crucial step in the refacing process, as they significantly impact the overall aesthetic of the kitchen. Various door styles are available, including raised panel, recessed panel, shaker, and slab doors, each offering a distinct look. Consider the existing kitchen décor and the desired style when making a selection.
The material of the cabinet doors is another important consideration. Wood doors offer a classic and luxurious appearance but require regular maintenance. MDF (medium-density fiberboard) doors are a cost-effective and stable alternative, providing a smooth surface for painting or laminating. Thermofoil doors are durable and easy to clean, offering a moisture-resistant option for kitchens.
Once the doors and drawer fronts have been selected, accurately measure and order them to ensure a perfect fit. Most cabinet door manufacturers offer custom sizing options to accommodate specific cabinet dimensions. When the doors arrive, carefully inspect them for any damage and ensure they match the specified dimensions.
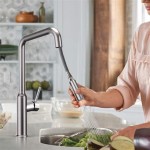
Installing the new cabinet doors involves attaching hinges to both the doors and the cabinet frames. Use a hinge jig to ensure proper alignment and consistent spacing. Adjust the hinges as needed to ensure the doors hang straight and close properly. Install new knobs or pulls to complete the look. Choose hardware that complements the style of the cabinet doors and the overall kitchen décor.
When installing drawer fronts, align them carefully with the drawer boxes and secure them with screws or adhesive. Ensure the drawer fronts are flush with the cabinet frames and operate smoothly. Adjust the drawer slides as needed to ensure proper alignment and smooth operation. With the new doors and hardware installed, the refaced cabinets will have a fresh and updated appearance, transforming the look of the entire kitchen.
Enhancing the Refaced Cabinets
Beyond the basic refacing process, several additional steps can be taken to enhance the functionality and aesthetics of the kitchen cabinets. Consider adding features like soft-close hinges and drawer slides to improve the usability and longevity of the cabinets. Soft-close mechanisms prevent slamming and reduce wear and tear on the hardware.
Adding under-cabinet lighting can significantly enhance the functionality and ambiance of the kitchen. LED strip lights are a popular option, providing bright and energy-efficient illumination for countertops and work areas. Install the lights discreetly under the cabinets to create a seamless and integrated look.
Consider installing pull-out shelves or organizers inside the cabinets to maximize storage space and improve accessibility. These accessories can make it easier to access items stored in the back of the cabinets, improving the overall organization and functionality of the kitchen. A variety of pull-out shelves and organizers are available to suit different cabinet sizes and storage needs.
Repainting or staining the cabinet frames before applying the veneer can create a cohesive and visually appealing look. Choose a paint or stain color that complements the new cabinet doors and the overall kitchen décor. This step ensures that the refaced cabinets blend seamlessly with the existing kitchen design.
Careful attention to detail and a commitment to quality craftsmanship can transform the appearance of kitchen cabinets through refacing. By following these steps and considering these enhancements, homeowners can achieve a professional-looking result that significantly improves the look and functionality of their kitchen.
Maintaining Refaced Cabinets
Proper maintenance is essential to preserving the appearance and longevity of refaced kitchen cabinets. Regular cleaning helps prevent the accumulation of grease, dirt, and grime, which can damage the finish over time. Use a mild soap and water solution to clean the cabinets, and avoid abrasive cleaners that can scratch or dull the surface.
Wipe down the cabinets regularly with a soft cloth to remove any spills or splatters. Pay particular attention to areas around the stove and sink, where grease and water are more likely to accumulate. Dry the cabinets thoroughly after cleaning to prevent water damage.
Periodically inspect the cabinet doors, drawer fronts, and hardware for any signs of damage. Tighten loose hinges and screws to prevent the doors from sagging or becoming misaligned. Repair any scratches or chips in the veneer or paint to prevent further damage.
Avoid placing hot pans or appliances directly on the cabinet surfaces, as this can damage the finish. Use trivets or heat-resistant mats to protect the cabinets from heat damage. Similarly, avoid using harsh chemicals or solvents to clean the cabinets, as these can strip the finish and damage the underlying material.
Consider applying a protective coating, such as a clear polyurethane or varnish, to the refaced cabinets to enhance their durability and resistance to stains and scratches. This coating will provide an extra layer of protection, extending the life of the refaced cabinets.

Cabinet Refacing Ideas Diy Projects Craft How To S For Home Decor With

How To Reface Kitchen Cabinets Affordable Cabinet Update On A Budget Anika S Diy Life

Diy Cabinet Refacing Budget Friendly Made Easy Wisewood

Diy Refacing Kitchen Cabinets Painted Furniture Ideas

Diy Cabinet Refacing Budget Friendly Made Easy Wisewood

5 Best Diy Kitchen Cabinet Refacing Ideas To Try

How To Reface Your Kitchen Cabinets Diy Family Handyman

21 Diy Affordable Ways To Redo Kitchen Cabinets Extra Space Storage

Reface Your Kitchen Cabinets Easy Diy Remodel

Best Kitchen Cabinet Refacing For Your Home The Depot
Related Posts