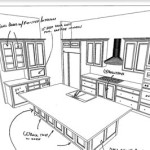
How to Refinish Your Kitchen Cabinets Yourself
Refinishing kitchen cabinets can dramatically transform the look of your kitchen without the expense of replacing them entirely. It's a rewarding DIY project that can be accomplished with patience and the right tools. This guide will walk you through the process of successfully refinishing your cabinets, offering step-by-step instructions and helpful tips.
1. Prepare the Cabinets
Before you start painting or staining, thorough preparation is crucial. This ensures a smooth and long-lasting finish.
Remove Hardware: Begin by removing all cabinet doors, drawers, hinges, knobs, and pulls. Label each piece for easy reassembly later.
Clean Thoroughly: Use a degreaser or trisodium phosphate (TSP) to remove grease, dirt, and grime from the cabinets. After cleaning, rinse thoroughly with water and allow to dry completely.
Sanding: Sanding removes old finishes and creates a smooth surface for the new paint or stain. Use fine-grit sandpaper (120-180 grit) for initial sanding and progressively move to finer grits (220-400 grit) for a smoother finish. Wear a dust mask and safety glasses to protect yourself from sanding dust.
Repair Damage: Use wood filler to repair any cracks, holes, or imperfections. Let the wood filler dry completely before sanding smooth.
Prime: Apply a high-quality primer to seal the wood and create a uniform surface for the final finish. Choose a primer specifically designed for cabinets and the type of paint or stain you will use. Allow the primer to dry completely before proceeding.
2. Apply Finish
After careful preparation, you're ready to apply the final finish. Choose between paint, stain, or a combination of both.
Painting: When choosing paint, consider the type of finish you desire. For a high-gloss look, use enamel paint. For a more durable finish, choose latex paint. Apply paint in thin, even coats, allowing each coat to dry completely before applying the next.
Staining: Staining provides a natural, wood-tone finish. Choose a stain color that complements your kitchen's aesthetic. Apply stain using a brush, cloth, or sponge, following the manufacturer's instructions. Ensure even application and avoid streaks. Apply a top coat of polyurethane to protect the stain and enhance its beauty.
Combination Finish: For a unique look, you can combine paint and stain. Apply a base coat of paint, followed by a top coat of stain or glaze. This creates a layered effect that adds depth and dimension.
3. Finishing Touches
Once the final finish is applied, it's time to complete the project with finishing touches.
Reinstall Hardware: Reattach the removed hardware, ensuring a secure fit and alignment.
Clean Excess Finish: Wipe down the cabinets to remove any excess paint or stain.
Allow for Curing: Allow the finish to cure completely according to the manufacturer's recommendations. This ensures full durability and prevents premature damage.
Enjoy your new kitchen cabinets! Refinishing your cabinets can revitalize your kitchen with a fresh and updated look.

How To Reface Kitchen Cabinets Affordable Cabinet Update On A Budget Anika S Diy Life

Diy Cabinet Refacing Budget Friendly Made Easy Wisewood

Diy Cabinet Refacing Budget Friendly Made Easy Wisewood

The Right Way To Paint Your Kitchen Cabinets And Save Factory Finish Guaranteed Emily Henderson

How To Refinish Kitchen Cabinets Diy

20 Diy Painted Kichen Cabinet Ideas A Cultivated Nest

Painted Furniture Ideas Diy Refacing Kitchen Cabinets

Cabinet Refacing Ideas Diy Projects Craft How To S For Home Decor With

How To Refinish Cabinets Like A Pro

Reface Your Kitchen Cabinets Easy Diy Remodel
Related Posts