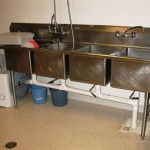
Replacing a kitchen sink can seem like a daunting task, but it doesn’t have to be. With the right tools and a bit of know-how, anyone can replace their kitchen sink in a few simple steps.
Gather the Necessary Tools and Materials
Before getting started, you’ll need to make sure you have the tools and materials necessary for the job. You’ll need a wrench, a screwdriver, plumber’s putty, a utility knife, silicone sealant, a bucket, and a new sink. Make sure you measure your current sink before purchasing a replacement, as sink sizes can vary.
Remove the Old Sink
Begin by disconnecting the plumbing. Turn off the water supply and disconnect the water lines from the faucet. Then, disconnect the sink drain from the drainpipe. Next, loosen the screws that secure the sink to the countertop and remove the sink. Use a putty knife to remove any remaining putty from the countertop.
Clean the Countertop
Using a scrub brush or rag, clean the countertop around the sink area. Make sure that all debris and dirt has been removed before continuing.
Install the New Sink
Place the new sink into the opening and make sure it is level. Apply plumber’s putty around the edges of the sink and secure the sink to the countertop with screws. Once the sink is secured, reconnect the water lines and drainpipe.
Seal the Sink
To prevent water from leaking, apply silicone sealant around the edges of the sink. Make sure the sealant is evenly applied and allow it to dry before turning the water back on.
Conclusion
Replacing a kitchen sink is a simple task that can be completed in a few steps. Gather the necessary tools and materials, remove the old sink, clean the countertop, install the new sink, and seal the sink. With a bit of preparation and patience, you’ll have your new sink installed in no time.


Related Posts


