Gather Your Materials
Before you start your project, you’ll need to gather the necessary materials. Depending on the size of your dresser and what kind of kitchen island you want to create, the list of materials may vary. Generally, you’ll need the following items:
- The dresser
- Sandpaper
- Paint and/or wood stain
- Casters
- Screws and anchors
- Hardware for attaching the casters
- Stainless steel (or other) countertop
- Caulk and/or construction adhesive
Prepare the Dresser
Once you have all the materials that you need, it’s time to start preparing the dresser. Start by removing all of the drawers and hardware from the dresser. Use sandpaper to sand down the dresser, removing any old paint or stain that may be present. This will help ensure that your finished product looks clean and professional. Once you’ve finished sanding, you can either paint or stain the dresser, depending on the look you’re going for.
Attach the Casters
Once the dresser is sanded and finished, it’s time to attach the casters. This is a fairly simple process, but it’s important to make sure that the casters are securely attached to the dresser. Use screws and anchors to attach the casters, making sure that the screws are properly secured. If you’re using heavier casters, you may need to use construction adhesive to ensure that they are firmly attached to the dresser.
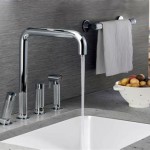
Attach the Countertop
Once the casters are attached, it’s time to attach the countertop. Make sure that the countertop is properly measured and cut to fit the dresser. Use construction adhesive to attach the countertop, and caulk to fill in any gaps. Once the countertop is attached, you can attach any hardware that you may need, such as towel bars or knife racks.
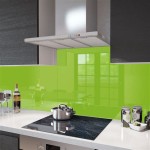
Finishing Touches
Once the countertop is attached and all of the hardware is in place, you can begin to add the finishing touches. This is where you can really customize the island to match your kitchen’s decor. Add a backsplash if desired, or add decorative trim to the edges of the countertop. You can also add a shelf or two to the bottom of the island to add extra storage space.
Enjoy Your New Kitchen Island
Now that your new kitchen island is complete, you can enjoy all the benefits that it brings. A kitchen island is the perfect addition to any kitchen, providing additional workspace and storage. With your new kitchen island, you can make meal preparation easier, have a place to serve meals, and even make entertaining guests a breeze.


Related Posts