Installing a kitchen sink is a job that requires precision and knowledge. It is important to have the correct mounting hardware to ensure a secure and long-lasting sink installation. This article will provide an overview of the various types of kitchen sink mounting hardware, as well as a step-by-step guide on how to install them.
Types of Kitchen Sink Mounting Hardware
There are several types of mounting hardware that are used to secure a kitchen sink. These include:
- Clips: Clips are used to secure the sink to the countertop and to the wall. They are usually made of metal and can be screwed into place. Some sinks come with clips included, while others require the purchase of additional clips.
- Brackets: Brackets are used to support the sink and provide additional stability. They are usually made of metal and can be mounted to the wall or the countertop.
- Gaskets: Gaskets are used to seal the sink and prevent water from leaking. They are usually made of rubber or silicone and can be purchased at most hardware stores.
- Tape: Tape is used to secure the sink to the countertop and can be purchased at most hardware stores.
How to Install Kitchen Sink Mounting Hardware
Installing kitchen sink mounting hardware is a relatively straightforward process. However, it is important to take the necessary precautions to ensure a secure installation. Here is a step-by-step guide on how to install kitchen sink mounting hardware:
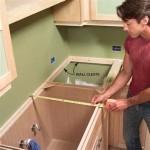
- Measure the sink and the countertop to determine the size and shape of the sink. This will help you choose the correct mounting hardware.
- Remove any existing mounting hardware from the sink and countertop. This may require the use of a screwdriver.
- Position the sink on the countertop and mark the location of the mounting holes. Use a pencil or marker to make these marks.
- Drill holes into the countertop in the locations marked in step three. Be sure to use the correct drill bit for the material of the countertop.
- Attach the mounting clips to the sink using the supplied screws. Make sure the clips are positioned correctly before tightening the screws.
- Attach the brackets to the wall or countertop using the supplied screws. Make sure the brackets are level before tightening the screws.
- Install the gaskets around the perimeter of the sink to ensure a watertight seal. Make sure the gaskets are positioned correctly before tightening the screws.
- Secure the sink to the countertop using tape. Make sure the tape is positioned correctly before tightening the screws.
Once the mounting hardware is securely in place, the kitchen sink should be ready for use. Be sure to check the mounting hardware periodically to make sure the sink is still securely in place.


Related Posts


