Replacing your kitchen sink sprayer is a straightforward task that can be completed in a matter of minutes. Whether you’re replacing an old, worn-out sprayer or looking to upgrade to a newer model, this guide will walk you through the process of replacing a kitchen sink sprayer.
Gather Your Tools
The first step of replacing your kitchen sink sprayer is to gather the necessary tools. You will need a wrench, adjustable pliers, a utility knife, needle-nose pliers, and a screwdriver. You may also need a basin wrench, depending on the type of sprayer you’re installing.
Disconnect the Old Sprayer
Once you have the necessary tools, you’ll need to start by disconnecting the old sprayer. Start by turning off the water supply to the sink. You can do this by turning off the shut-off valves under the sink. Then, use the wrench to disconnect the sprayer hose from the supply line. Finally, you can unscrew the mounting nut that holds the sprayer in place.
Install the New Sprayer
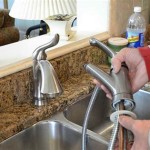
Once the old sprayer is disconnected, you can install the new sprayer. Start by attaching the new sprayer hose to the supply line. Then, use the adjustable pliers to tighten the connection. Next, use the basin wrench to attach the sprayer mounting nut to the sink. Finally, you can use the screwdriver to secure the sprayer in place.
Test the New Sprayer
Once the new sprayer is installed, you can test it out. Turn on the water supply to the sink and check for any leaks. If you don’t see any, you can turn on the sprayer and check for any leaks. Finally, check the spray pattern to make sure it is working properly.
Conclusion
Replacing your kitchen sink sprayer is an easy task that can be completed in a matter of minutes. With the right tools and a bit of know-how, you can easily replace your kitchen sink sprayer and enjoy the convenience of an upgraded kitchen sink.


Related Posts


