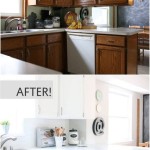
Painting your kitchen stove can be an easy and affordable way to give your kitchen a brand-new look. From choosing the right paint to proper preparation and application, this guide will help you get the job done right. With the right supplies and a bit of patience, you can have a beautiful new kitchen stove in no time.
Choosing the Right Paint
The most important step in painting your kitchen stove is choosing the right paint. You’ll need a durable, high-heat paint that is designed specifically for stoves. Look for paints labeled as “stovetop-safe” or “high-heat” paints, as these are designed to withstand high temperatures. Make sure the paint is compatible with the material of your stove, as some paints are only meant for certain surfaces. If you’re unsure which paint to choose, contact a professional for advice.
Preparing the Stove for Painting
Before you start painting, you’ll need to thoroughly clean and prepare the stove. Start by removing all of the burners, knobs, and other removable parts. Then, give the stove a thorough scrubbing with a degreasing cleaner. After the stove is clean and dry, use sandpaper to lightly sand it, paying close attention to any areas with rust or discoloration. This will help the paint adhere better and improve the overall finish.
Applying the Paint
Once the stove is clean and prepped, it’s time to start painting. Start by applying a coat of primer, which will help the paint adhere better and provide a more even finish. Once the primer is dry, apply the paint. Be sure to use even strokes and multiple thin coats, as this will help you achieve a more even finish. Allow each coat of paint to dry completely before applying the next, and be sure to keep the room well-ventilated, as some paints may produce strong fumes.
Finishing Touches
Once the paint has dried completely, reattach the removable parts of the stove. You can also add a few decorative touches, such as adding a new knob or knob covers. Finally, give the stove one last cleaning with a degreasing cleaner to remove any dust or debris. And that’s it—you now have a beautiful new kitchen stove!


Related Posts

