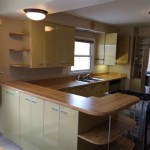
Updating your kitchen cabinets is a great way to give your kitchen a fresh new look. Whether you’re looking for a quick and cost-effective way to update your kitchen or if you’re planning a full-scale remodel, resurfacing your kitchen cabinets is a great way to get the job done. In this comprehensive guide, we’ll cover the basics of resurfacing kitchen cabinets, as well as offer some tips and tricks to make sure your project goes smoothly.
Why Resurface Your Kitchen Cabinets?
Resurfacing kitchen cabinets is a great way to give your kitchen a quick and cost-effective update. Resurfacing involves covering the existing cabinets with a new veneer or laminate, which can give them a fresh new look without having to replace the entire cabinet. Not only is it more cost-effective, but it’s also easier and faster than replacing the cabinets. Additionally, you can choose from a wide variety of colors and styles, so you can easily find something that fits your design aesthetic.
Preparation
Before you begin resurfacing your kitchen cabinets, there are a few steps you need to take to prepare the space. First, you’ll want to remove all of the doors, drawers, and hardware from the cabinets. This will make it easier to access the different parts of the cabinet and will also help you avoid any damage to the hardware. Once you’ve removed all of the doors, drawers, and hardware, you’ll want to thoroughly clean the cabinets with a degreasing cleaner. This will help to remove any dirt, grease, and grime that may have built up over time.
Materials Needed
Once you’ve prepared the cabinets, you’ll need to gather the materials needed to complete the job. The following items will be needed to complete the project:
- Veneer or laminate
- Paint or stain
- Sandpaper
- Screws
- Measuring tape
- Putty knife
- Caulk gun
Step-by-Step Guide
Now that you’ve gathered all of the materials needed to resurface your kitchen cabinets, you’re ready to begin. Follow the steps below to get started:
- Measure the cabinets. Measure the width, height, and depth of the cabinet openings to make sure you purchase the correct size veneer or laminate.
- Sand the cabinets. Sand the cabinets to remove any imperfections and to provide a better surface for the veneer or laminate to adhere to.
- Cut the veneer or laminate. Cut the veneer or laminate to the correct size and shape to fit the cabinets.
- Apply the veneer or laminate. Use a putty knife to carefully apply the veneer or laminate to the cabinets.
- Secure the veneer or laminate. Use screws to secure the veneer or laminate to the cabinets.
- Paint or stain. Once the veneer or laminate is secure, you can paint or stain the cabinets to your desired color.
- Reattach the doors, drawers, and hardware. Reattach the doors, drawers, and hardware to the cabinets using the same screws you used to secure the veneer or laminate.
Tips & Tricks
While the process of resurfacing kitchen cabinets may seem daunting, there are a few tips and tricks that can help make the job easier. Here are a few to keep in mind:
- Measure twice, cut once. Take your time to make sure you measure and cut the veneer or laminate correctly. This will ensure that it fits the cabinets perfectly.
- Use a caulking gun. Use a caulking gun to apply the veneer or laminate more evenly and to avoid any air bubbles.
- Take your time. Don’t rush the job. Take your time to make sure you get the best results.
Conclusion
Resurfacing kitchen cabinets is a great way to give your kitchen a fresh new look without having to replace the entire cabinet. By following the steps outlined in this comprehensive guide, you can easily update your kitchen cabinets in no time. Just remember to take your time and use the tips and tricks provided for the best results.


Related Posts


