How To Build An Outdoor Kitchen Island With Metal Studs
An outdoor kitchen island is a great way to add extra counter space, storage, and functionality to your outdoor living area. It can also be a great place to entertain guests or simply relax and enjoy the outdoors. If you're thinking about building an outdoor kitchen island, here are some things to keep in mind.
Materials You'll Need
* Metal studs * Drywall * Concrete backer board * Tile * Mortar * Grout * Countertop * Cabinets * Sink * Faucet * Appliances (optional)Tools You'll Need
* Stud finder * Circular saw * Drill * Screwdriver * Level * Measuring tape * Pencil * Safety glassesInstructions
1.Plan your island.
The first step is to decide where you want your island to be located and how big you want it to be. Once you have a plan, you can start gathering the materials you'll need. 2.Build the frame.
The frame of your island will be made from metal studs. Cut the studs to the desired length and assemble them using screws. Make sure the frame is level and square. 3.Install the drywall.
Once the frame is built, you can install the drywall. Cut the drywall to fit the frame and screw it into place. 4.Install the concrete backer board.
The concrete backer board will provide a solid surface for the tile. Cut the backer board to fit the countertop area and screw it into place. 5.Tile the countertop.
Now you can tile the countertop. Apply mortar to the back of the tiles and press them into place on the backer board. Once the mortar has set, grout the tiles. 6.Install the cabinets.
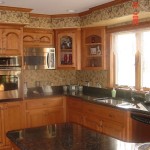
The cabinets will provide storage space for your kitchen supplies. Assemble the cabinets according to the manufacturer's instructions and install them in place. 7.Install the sink.
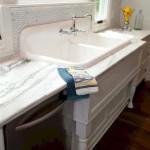
The sink will be the main focal point of your island. Cut a hole in the countertop for the sink and install it according to the manufacturer's instructions. 8.Install the faucet.
The faucet will provide water for your sink. Install the faucet according to the manufacturer's instructions. 9.Install the appliances.
If you're adding appliances to your island, such as a grill or refrigerator, install them now. 10.Finish your island.
Once everything is installed, you can finish your island by adding a countertop, trim, and any other desired accessories.Tips
* Use a level to make sure your island is level and square. * Be careful when cutting the drywall and tile. * Use a caulk gun to seal any gaps between the tiles and the countertop. * Add a few stools or chairs to your island so you can sit and enjoy your outdoor kitchen.
How To Build An Outdoor Kitchen With Metal Studs 15 Steps Island Plans

Outdoor Kitchen Framing 11 Helpful Facts You Should Know

How To Build A Bbq Island With Steel Studs Thegrill Com

How To Build A Bbq Island With Steel Studs East Coast Grill

How To Build A Bbq Island With Steel Studs Outdoor Kitchen Plans

Rolling Outdoor Island Building Plans Pneumatic Addict

Rolling Outdoor Island Building Plans Pneumatic Addict

Framing The Outdoor Kitchen Island First Time Using Metal Studs

My Pas Outdoor Kitchen Build Contractor Talk Professional Construction And Remodeling Forum

Steel Stud Outdoor Kitchen Construction Allows For More Space Build Plans
Related Posts