Caulking Around Your Kitchen Sink Drain: A Comprehensive Guide
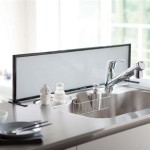
Maintaining a watertight seal around your kitchen sink drain is crucial for preventing water damage, mold growth, and costly plumbing repairs. Caulking acts as this essential barrier, filling gaps between the drain flange, the sink basin, and the surrounding countertop or surface. Over time, however, caulk can dry out, crack, or peel away, compromising its protective function. This article provides a detailed guide on why caulking around the kitchen sink drain is critical, the types of caulk to use, the tools required, and a step-by-step process for achieving a durable and effective seal.
The Importance of a Watertight Seal
The primary function of caulk around a kitchen sink drain is to create a watertight seal. Without this seal, water can seep through the gaps, potentially causing significant damage. Here's a breakdown of the problems that can arise from a compromised seal:
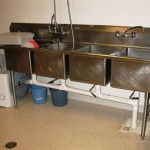
Water Damage: Leaking water can infiltrate the cabinet beneath the sink, damaging the wood and other materials. This can lead to warping, rotting, and structural weakness over time. Furthermore, water can spread beyond the immediate area, affecting flooring and walls in adjacent spaces.
Mold and Mildew Growth: The dark, damp environment under a kitchen sink provides an ideal breeding ground for mold and mildew. These microorganisms can thrive on organic materials like wood, drywall, and even certain types of caulk. Mold and mildew growth not only causes unpleasant odors but can also pose health risks, particularly for individuals with allergies or respiratory issues. Early detection and remediation are crucial, but preventing leaks in the first place is the most effective strategy.
Cabinet Damage: The constant exposure to moisture can significantly shorten the lifespan of kitchen cabinets. Water damage can weaken the cabinet structure, making it more susceptible to collapse or damage from weight. Replacing cabinets is an expensive undertaking, so maintaining a watertight seal around the sink drain is a worthwhile investment.
Plumbing Issues: Water leaking from the drain can also corrode metal pipes and fixtures, leading to further plumbing problems. Corrosion can weaken the pipes, making them more prone to leaks or bursts. Addressing these issues can be time-consuming and costly, often requiring professional plumbing services.
Unsightly Stains and Discoloration: Even minor leaks can leave behind unsightly stains and discoloration on the sink, countertop, or surrounding surfaces. These stains can be difficult to remove and can detract from the overall appearance of the kitchen.
Choosing the Right Type of Caulk
Selecting the appropriate type of caulk is essential for achieving a long-lasting and effective seal around the kitchen sink drain. Several types of caulk are available, each with its own properties and ideal applications. Here are some of the most common options:
100% Silicone Caulk: Silicone caulk is known for its excellent flexibility, water resistance, and durability. It adheres well to a variety of surfaces, including ceramic, porcelain, metal, and glass. Silicone caulk is also resistant to mold and mildew growth, making it a popular choice for kitchen and bathroom applications. When selecting silicone caulk, ensure that it is labeled as "100% silicone" for optimal performance. Avoid silicone blends, which may not offer the same level of water resistance and durability.
Acrylic Latex Caulk with Silicone: This type of caulk combines the benefits of acrylic latex caulk with the added water resistance of silicone. It is easier to apply and clean up than 100% silicone caulk, and it can be painted over to match the surrounding décor. Acrylic latex caulk with silicone is a good option for areas where aesthetics are a concern, but it may not be as durable or water-resistant as 100% silicone caulk.
Plumber's Putty: While not technically a caulk, plumber's putty is a pliable compound used to create a watertight seal between the drain flange and the sink basin. It is typically used in conjunction with caulk to provide an extra layer of protection against leaks. Plumber's putty is not adhesive and must be used in conjunction with the drain's fastening mechanism to hold it in place. It should be applied before the drain flange is installed and tightened. Excess putty is then trimmed away after installation.
Hybrid Polymer Sealants: These sealants combine the best properties of silicone and polyurethane, offering excellent adhesion, flexibility, and durability. They are resistant to UV exposure, temperature fluctuations, and chemical degradation, making them suitable for demanding applications. Hybrid polymer sealants are generally more expensive than silicone or acrylic latex caulk, but they offer superior performance and longevity.
When choosing a caulk, consider the specific requirements of your kitchen sink and drain. If you are looking for maximum water resistance and durability, 100% silicone caulk is generally the best option. If you need a caulk that can be painted over, acrylic latex caulk with silicone may be a better choice. Always read the product label carefully to ensure that the caulk is suitable for use in wet environments and that it is compatible with the materials of your sink and countertop.
Tools and Materials Required for Caulking
Before beginning the caulking process, gather the necessary tools and materials. Having everything on hand will make the job easier and more efficient.
Caulk Gun: A caulk gun is essential for applying caulk smoothly and evenly. Choose a caulk gun with a comfortable grip and a smooth trigger mechanism. Ratcheting caulk guns are generally easier to use than standard caulk guns.
Caulk Tube: Select the appropriate type of caulk based on the considerations discussed earlier. Ensure that the caulk tube is fresh and has not expired.
Utility Knife or Caulk Removal Tool: A utility knife or caulk removal tool is used to remove old caulk from the sink and countertop. A specialized caulk removal tool can make the job easier and less likely to damage the surrounding surfaces.
Scraper: A scraper is used to remove any remaining caulk residue after the bulk of the old caulk has been removed.
Cleaning Supplies: Cleaning supplies are needed to thoroughly clean the area around the sink drain before applying new caulk. Use a mild detergent and water to remove any dirt, grease, or debris. Abrasive cleaners should be avoided as they can scratch the sink or countertop.
Rubbing Alcohol: Rubbing alcohol is used to remove any remaining residue and to ensure that the surface is clean and dry before applying new caulk.
Paper Towels or Rags: Paper towels or rags are used to clean up spills and to wipe excess caulk.
Caulk Smoothing Tool or Finger: A caulk smoothing tool or a gloved finger can be used to create a smooth, professional-looking caulk bead. If using a finger, dip it in water mixed with a drop of dish soap to prevent the caulk from sticking.
Painter's Tape: Painter's tape can be used to create clean, crisp lines around the sink drain. Apply the tape along the edges of the area to be caulked, leaving a narrow gap for the caulk.
Gloves: Wearing gloves will protect your hands from the caulk and cleaning chemicals.
Step-by-Step Guide to Caulking Around a Kitchen Sink Drain
Follow these steps to properly caulk around your kitchen sink drain:
Step 1: Remove the Old Caulk: Use a utility knife or caulk removal tool to carefully cut along the edges of the old caulk. Be careful not to scratch the sink or countertop. Once the edges are cut, use a scraper to remove the bulk of the old caulk. For stubborn areas, you may need to use a heat gun or hairdryer to soften the caulk before scraping it away. After removing the old caulk, clean the area thoroughly with a mild detergent and water. Rinse well and allow the surface to dry completely. Finish by wiping the area with rubbing alcohol to remove any remaining residue.
Step 2: Prepare the Surface: Ensure that the surface around the sink drain is clean, dry, and free of any debris. If desired, apply painter's tape along the edges of the area to be caulked, leaving a narrow gap for the caulk. This will help to create clean, crisp lines.
Step 3: Load the Caulk Gun: Cut the tip of the caulk tube at a 45-degree angle, making the opening slightly smaller than the desired width of the caulk bead. Puncture the seal inside the tube with a long nail or wire. Insert the caulk tube into the caulk gun and squeeze the trigger until the caulk begins to flow.
Step 4: Apply the Caulk: Hold the caulk gun at a 45-degree angle and apply a steady, even bead of caulk along the gap between the drain flange and the sink basin. Avoid applying too much caulk at once. It is better to apply a thin bead and then smooth it out than to apply a thick bead that is difficult to control.
Step 5: Smooth the Caulk: Immediately after applying the caulk, use a caulk smoothing tool or a gloved finger to smooth the bead. Apply gentle pressure to create a smooth, concave surface. If using a finger, dip it in water mixed with a drop of dish soap to prevent the caulk from sticking.
Step 6: Remove Excess Caulk: Use a damp cloth or paper towel to wipe away any excess caulk from the sink and countertop.
Step 7: Remove the Painter's Tape: If you used painter's tape, remove it carefully while the caulk is still wet. This will help to create clean, crisp lines.
Step 8: Allow the Caulk to Cure: Allow the caulk to cure completely according to the manufacturer's instructions. This typically takes 24 to 48 hours. Avoid using the sink during the curing process.
Step 9: Inspect the Seal: Once the caulk has cured, inspect the seal carefully to ensure that there are no gaps or cracks. If necessary, apply a second bead of caulk to fill any imperfections.
By following these steps, you can create a durable and effective seal around your kitchen sink drain, protecting your cabinets and preventing water damage.

How To Caulk A Drain 14 Steps With Pictures Wikihow Life

How To Caulk A Drain 14 Steps With Pictures Wikihow Life

How To Caulk A Drain 14 Steps With Pictures Wikihow Life

Why The Edges Of Kitchen Sink Leak Mr Rooter

How To Caulk The Kitchen Sink With Pictures Wikihow

How To Silicone Mastic Around A Sink

Caulking Around A Kitchen Sink

How To Caulk Seal A Kitchen Sink On Laminate Countertop Caulking Tips

Plumber S Putty Or Silicone Caulk Which Is Best Tinged Blue

Silicone Instead Of Plumbers Putty On Kitchen Drain Basket
Related Posts