Replacing a kitchen faucet sprayer is an easy and inexpensive way to give your kitchen an upgrade. Whether you’re replacing an old, worn, or broken sprayer, or just want to give your sink a facelift, the process is straightforward and can be completed in an hour or less. In this article, we’ll walk you through the steps of replacing a kitchen faucet sprayer, from choosing the right model to making the final installation.
Choosing the Right Model
The first step in replacing a kitchen faucet sprayer is selecting the right model. Be sure to measure the existing sprayer to make sure the new one will fit. You’ll also want to consider the type of sprayer you want—whether it’s a pull-down, pull-out, or side-mounted model—as well as the finish and other features that will best suit your needs.
Gathering the Necessary Tools and Supplies
Once you’ve chosen the right model, you’ll need to gather the necessary tools and supplies. This includes a basin wrench, adjustable wrench, and plumber’s tape, along with the replacement sprayer and any other parts that may be required for installation. The basin wrench is a specialty tool that allows you to access hard-to-reach nuts and bolts under the sink.
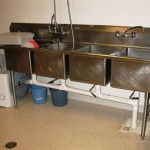
Removing the Old Sprayer
Before you can install the new sprayer, you’ll need to remove the old one. Use the basin wrench to loosen and remove the mounting nut, then pull the sprayer off the end of the hose. Depending on what type of sprayer you have, you may need to disconnect the water supply line before you can remove the sprayer.
Installing the New Sprayer
Once the old sprayer is removed, it’s time to install the new one. Start by wrapping the threads of the mounting nut with a few layers of plumber’s tape. Then, attach the new sprayer to the hose and tighten the mounting nut with the basin wrench. Finally, reconnect the water supply line and turn on the water to test the sprayer.
Finishing Touches
Once you’ve installed the new sprayer, you may want to make some finishing touches. If the sprayer has a spray diverter, you’ll want to make sure it’s working properly. You’ll also want to check the spray head for leaks and make sure it’s seated tightly against the sink. Finally, use a damp cloth to wipe down the sprayer and remove any excess water.


Related Posts