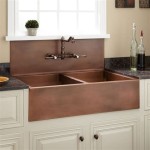
Make Your Own Kitchen Island
A kitchen island can significantly enhance both the functionality and aesthetics of a kitchen. It provides additional counter space, storage, and potentially seating. While purchasing a pre-built island is an option, building one offers the advantage of customization to fit specific needs and the kitchen's existing style. This article will guide readers through the process of constructing their own kitchen island.
Planning and Design
Careful planning is crucial for a successful DIY kitchen island project. Consider the following:
- Purpose: Determine the island's primary function. Will it be primarily for food preparation, eating, or storage?
- Size and Placement: Measure the kitchen to ensure adequate space for the island and comfortable traffic flow around it. Leave at least 36 inches of clearance on all sides.
- Features: Decide on desired features such as a sink, cooktop, dishwasher, or seating.
- Budget: Establish a realistic budget for materials and appliances.
- Style: Choose a style that complements the existing kitchen décor.
Materials and Tools
Once the design is finalized, gather the necessary materials and tools. The following list provides a general overview; specific requirements will vary based on the design.
- Lumber: Choose sturdy lumber like plywood, MDF, or solid wood for the cabinet frame and countertop support.
- Countertop Material: Options include butcher block, granite, quartz, or laminate.
- Cabinet Hardware: Select hinges, drawer slides, knobs, and pulls.
- Fasteners: Wood screws, nails, and potentially bolts.
- Finishing Materials: Paint, stain, and sealant.
- Tools: Circular saw, drill, screwdriver, measuring tape, level, and safety glasses.
Building the Island Frame
Constructing the island frame is a key step. Accuracy in this stage ensures a stable and level final product.
- Base Construction: Build a rectangular frame from lumber, using screws for secure joints. Add cross supports for stability.
- Cabinet Assembly: Assemble the cabinet boxes using pre-cut plywood or build custom boxes from scratch.
- Frame Attachment: Securely attach the cabinet boxes to the base frame.
- Sheathing: Cover the frame with plywood or other sheathing material for a finished look.
Installing the Countertop
The countertop significantly impacts both the island's aesthetic appeal and functionality. Precise installation is crucial.
- Countertop Preparation: If using a material that requires cutting or shaping, do so before installation. Ensure accurate measurements.
- Adhesive Application: Apply a strong adhesive specifically designed for countertops to the island frame.
- Countertop Placement: Carefully position the countertop on the frame, ensuring it is flush with the edges.
- Securing: Use clamps or weights to secure the countertop while the adhesive dries.
- Sealing: Seal the countertop edges to prevent moisture damage.
Adding Finishing Touches
Once the main structure is complete, attention to detail in the finishing stages enhances the overall quality of the island.
- Painting or Staining: Apply paint or stain to the island frame and cabinet doors, ensuring even coverage.
- Hardware Installation: Install cabinet hardware, including knobs, pulls, and hinges.
- Electrical and Plumbing (Optional): If incorporating a sink, cooktop, or other appliances, ensure proper electrical and plumbing connections are made by qualified professionals.
Safety Considerations
Safety should be a priority throughout the project. Consider these points:
- Eye Protection: Always wear safety glasses when using power tools.
- Ventilation: Ensure proper ventilation when working with paints, stains, or adhesives.
- Electrical Safety: If working with electrical wiring, disconnect power before starting any work.
- Lifting Techniques: Use proper lifting techniques to avoid back injuries, especially when handling heavy materials like countertops.
- Professional Assistance: If unsure about any aspect of the project, consult with a qualified professional.
Cost Considerations
Building a kitchen island can potentially save money compared to purchasing a pre-built one. However, careful budgeting is essential.
- Material Costs: Research and compare prices for lumber, countertops, and hardware.
- Tool Rental: If specific tools are needed for a short period, consider renting instead of purchasing.
- Appliance Costs: Factor in the cost of any appliances, such as sinks, cooktops, or dishwashers.
- Unexpected Expenses: Include a buffer in the budget for unforeseen expenses that may arise.

Diy Build Your Own Kitchen Island The May Daily

How To Build A Diy Kitchen Island House By The Bay Design

Diy Kitchen Island

15 Diy Kitchen Islands Unique Island Ideas And Decor

40 Diy Kitchen Island Ideas That Can Transform Your Home

Refresh Your Kitchen With Unique Island Ideas Hometalk
:strip_icc()/103058781-a03e8c2363914f6c94d5d14eb13e5b34.jpg?strip=all)
How To Make A Kitchen Island

Build A Diy Kitchen Island Basic

Woman S Shows You How To Create Your Own Kitchen Island For Only 100 Lifestyle News Asiaone

40 Diy Kitchen Island Ideas That Can Transform Your Home
Related Posts

